Labels

Attic (4) Baking (14) Bird Bottles (3) Books (1) Buttons (2) Challenges (5) Chuckles (3) Cleaning (1) Confessions (6) Cooking (23) Critters (12) Decorating (1) Fabric (3) Fall (5) Freebies (3) Holidays (23) Kitchen (2) Meal Planning (6) Organizing (6) Parenting (2) Pumpkin (5) Quilt Camp (2) Quilt Guild (3) Quilting (11) Rainbows (2) Recipes (14) Saving Money (17) Scrap Bins (3) Sewing (8) Sewing Room (12) Spring (10) Summer (7) Tuesday Tips (14) Tutorials (3) Vacation (8) Winter (1)
Showing posts with label Recipes. Show all posts

Monday, April 8, 2013

Pineapple Chicken Salad

Spring makes me want to eat chicken salad sandwiches!

My Mom used to make her chicken salad with just mayo and a little chopped celery. I liked chicken salad back then.

But I've loved chicken salad since I learned to make it this way. Bright and cheerful are not adjectives normally used in food writing, but they describe this fruity chicken salad perfectly!

Cheerful Chicken Salad

Desired amount of chopped chicken breast (I use the kind in a can)
Mayonnaise or salad dressing (I use Miracle Whip Light, Hellman's, or Duke's)
Chopped walnuts
Chopped celery 
Canned pineapple chunks
Garlic salt or other desired seasonings

1. If using canned chicken, drain completely, then use the can lid to press out as much more liquid as possible. 
2. Place chicken in a bowl and stir in enough of your chosen dressing to moisten and bond the chicken together.
3. Stir in as much or as little chopped celery as your family likes. 
4. Stir in as many chopped walnuts as desired.
5. Drain the canned pineapple, then squeeze out as much liquid as possible with your hands. (This is important! If you don't, there will be too much liquid in your chicken salad.) Mix in the pineappple chunks.
6. Season with garic salt or other desired seasonings you wish.
7. Chill before serving.

My favorite way to eat this chicken salad is on wheat toast with a lettuce leaf, but it's also elegant and delicious served atop a fresh green salad. The restaurant where I picked up this recipe used to serve it that way, with a huge banana-nut muffin on the side! Yum.

By the way, my second favorite chicken salad, served at the first "ladies' luncheon" I ever attended, was made with Hellman's mayonnaise, chopped celery, and green grape halves! Also extremely simple, fresh and delicate.

What's in your favorite chicken salad?  

Sunday, March 31, 2013

Chocolate for Breakfast!

That got your attention, didn't it? The Easter Bunny brought Madeline chocolate candy and glitter nail polish- what else could a girl want? So we had chocolate for breakfasst. Steve and I ate ours straight out of the wrapper, while Madeline chose add little bits of chocolate to her pancake batter.

Easter Morning Chocolate Chunk Pancakes


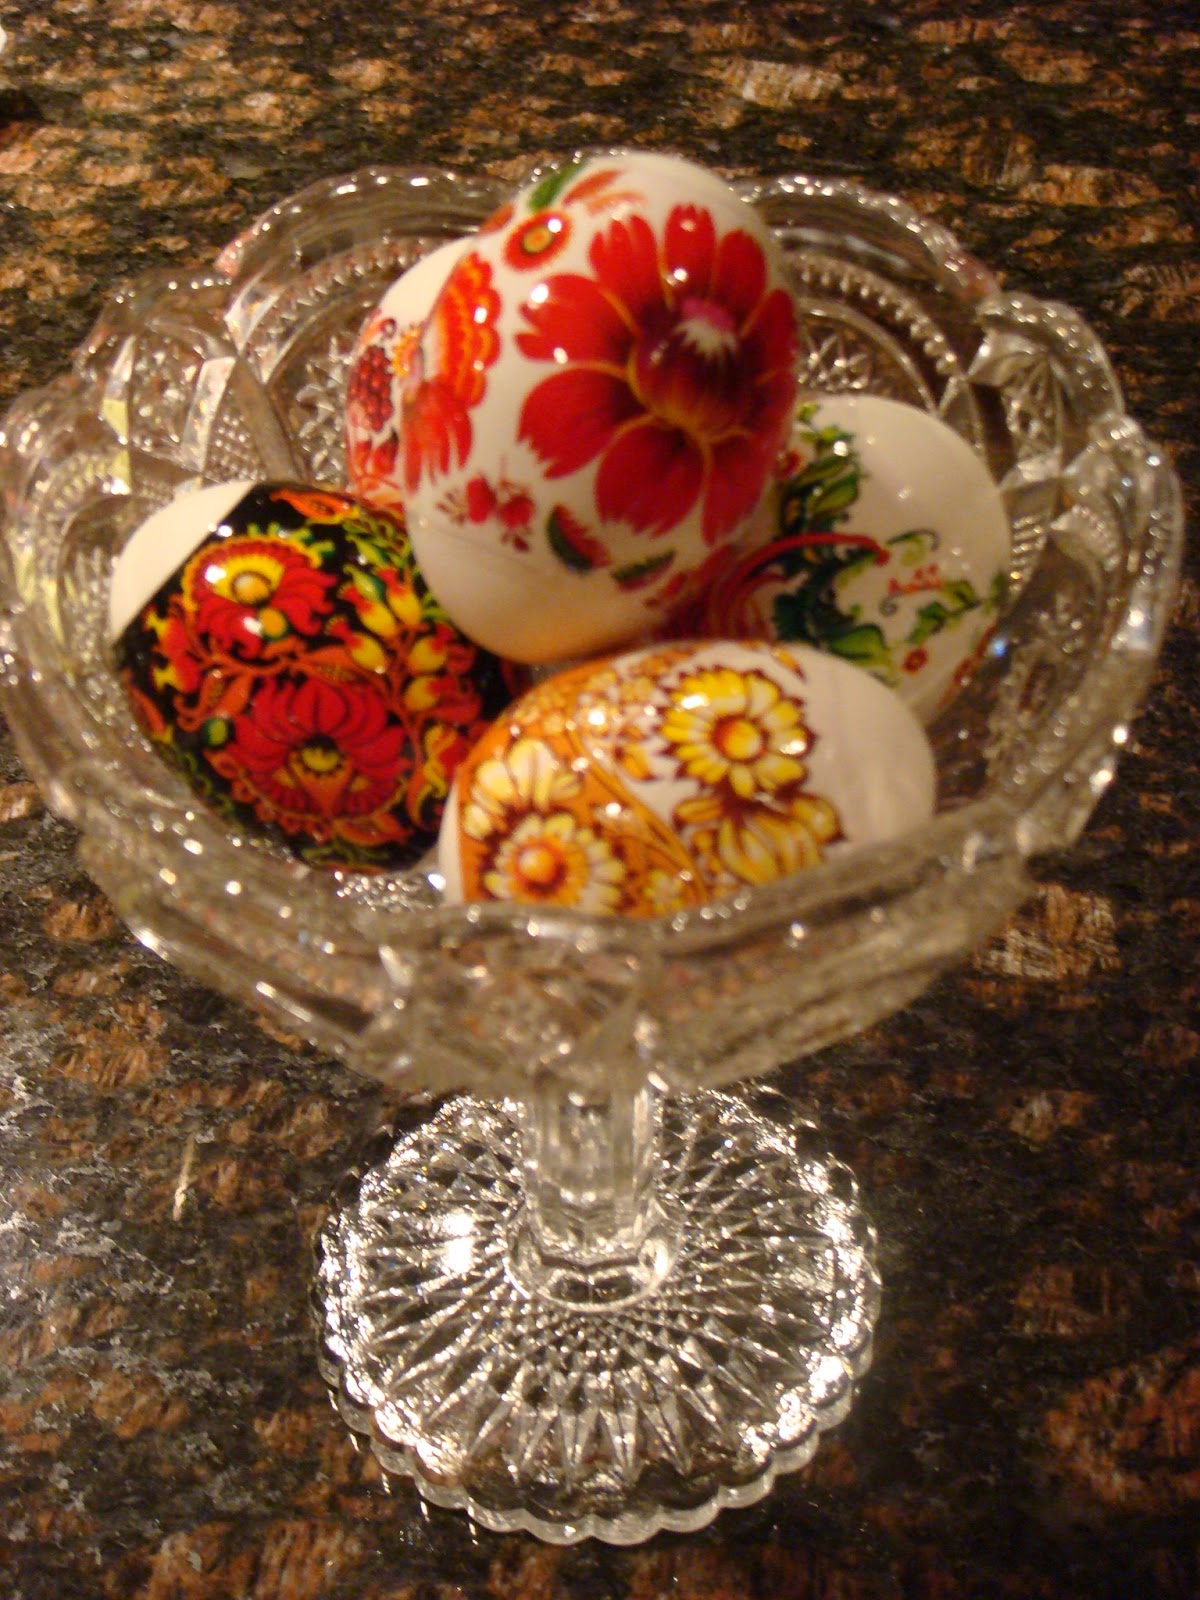
Our favorite method of decorating eggs is so easy! This simple, yet elegant, display of five Easter eggs took less than five minutes to assemble. (OK, we cheated a little. The eggs were already boiled.) 


Hope you had a great holiday with your family (and chocolate for breakfast), too!

Sunday, March 10, 2013

Pumpkin Gingerbread


I've posted two sweet bread recipes previously (Cranberry-Pumpkin Bread and Banana Gingerbread), which I would've sworn (and probably did swear) were the best ever! Well, they were good, but this amazing loaf is even better. I'd love to cite the original recipe source, but it's been languishing in my file too long to say where it came from! 


Pumpkin Gingerbread

Batter:
2 cups flour
1/2 cup packed brown sugar
2 teaspoon baking powder
1 teaspoon cinnamon
1/2 teaspoon baking soda
1 cup canned pumpkin
1/2 cup molasses
2 eggs
1/3 cup butter, melted
1/4 cup milk
1 teaspoon ginger

Topping:
1/2 cup chopped walnuts
2 tablespoons sugar

1. Preheat oven to 350  degrees and grease a 9x5x3" loaf pan.
2. In a large bowl, sift together 1 cup of the flour, brown sugar, baking powder, cinnamon and baking soda.
3. Add pumpkin, molasses, eggs, butter, milk and ginger. Blend well.
4.Add remaining flour and beat well to combine.
5. Pour mixture into prepared pan. For topping, mix walnuts and sugar together and sprinkle over batter. 
6. Bake at 350 degrees for one hour, or until wooden pick or cake tester inserted in center of loaf comes out clean.
7. Cool on wire rack. Wrap in plastic wrap for storage. Though I didn't try it yet, this bread should freeze well, too.

My family is so-o-o-o glad I finally tried this one. It's their new favorite- and mine, too! Try it and let me know what you think.


Saturday, December 22, 2012

What if You Don't Have Cake Flour? Make Your Own.

The Southern Living Brown Sugar Pound Cake Madeline and I wanted to bake called for three cups of cake flour. Naturally, we didn't have any in our pantry. Nor did we really know what it was. Did it matter? Could we use all-purpose flour instead? We really wanted to make this cake!


What is cake flour?


Well, according to the dictionary, cake flour is a softer flour which is higher in protein, has a higher starch content, and produces a lighter texture in baked goods than all purpose flour.


How to Make Your Own Cake Flour


Some sources suggest that one cup of cake flour is equal to one cup less two tablespoons of all-purpose flour, sifted. That solution seems to address the texture/softness issue, but what about the starch?

The subtitution that made sense to me scientifically (if I should even be using the words me and scientifically in the same sentence) was the following:

For each cup of cake flour needed, remove two tablespoons from one cup of all-purpose flour and replace it with cornstarch. Then sift four or five times for a lighter texture.

It occurs to me now that an easier way might be to put two tablespoons of cornstarch in a dry meauring cup and fill it the rest of the way up with flour.


Does it work?


I won't know how it tastes until it's cut, but the resulting Brown Sugar Pound Cake is pure baking p@rn (and smells delicious):


Look for this post to disappear tomorrow evening if this gorgeous cake tastes like sawdust! If it does, at least there's vanilla ice cream!

The rest of the menu for this Christmas-Eve-Eve dinner with our next-door-neighbors is:

Homemade Maryland-Style Crab Cakes w/ Mustard Sauce
Duchess Potatoes
Creamed Spinach
Corn Pudding
Yeast Rolls (frozen)
Plenty of wine 
and Bellinis (Prosecco and peach puree)


Lots of cream, butter, mayonnaise, sugar and other carbs with a little seafood and a few vegetables thrown in for good measure! We spare no calories for special holiday dinners. There's plenty of time to eat healthy later...

Hope you're able to enjoy your holiday meals without guilt!


Tuesday, October 30, 2012

Perfectly Toasted Pumpkin Seeds


Every year I toast the pumpkin seeds from our jack-o-lantern. And every year I don't like the way they turn out- usually burnt. Until this year! I present to you my process, arrived at through much trial and error, for:

Perfectly Toasted Pumpkin Seeds


What you need:
rimmed metal baking sheet or pan
seeds from 1 pumpkin (probably somewhere between 1 and 2 cups)
olive oil
salt

Here's what I did:

1. I did not bother to rinse my pumpkin seeds. I just picked out the really big pieces and left most of the little stringy stuff. As someone else suggested, a little pumpkin goo never hurt anybody, and adds even more flavor. It dries up when you bake the seeds.

2. I read somewhere that it would be a good idea to spread out the seeds in a single layer to dry overnight. So I did. This seemed preferable to boiling the seeds in salty water prior to baking, as another website suggested. Both methods claim to make them easier to eat if you plan to eat the entire seed rather than cracking it open to get just the tender kernel inside.  I really don't think I'd go to all this trouble for a few tiny morsels.

3. When you're ready to roast, toss the seeds with 1 or 2 tablespoons of olive oil (in my failed attempts I used regular vegetable oil) and salt to taste.

4. Place on a greased rimmed metal baking sheet or pan in a single layer.

5. Preheat your oven to 300 degrees and bake until the seeds are lightly browned and fragrant.

For how long, you ask? 
I think this is the important part:

6. Depended on how many seeds you're toasting, how thick or thin your seeds are, how dark your baking pan is, how well your oven is calibrated, how much oil you used, and Lord knows how many other factors, this will probably take between 10 and 30 minutes (some say up to 45). I wouldn't believe any recipe or chef who presumes to give you an exact time. Mine took 20 minutes. About half-way through I took them out, shook the pan, and tasted one to check their progress. When they're done: they smell delicious, appear nicely browned, and taste crispy but are easy to bite into and chew. Sort of like an APGAR score for pumpkin seeds!

I think you can store these in an airtight container for about a week, but you won't need to!

And just to prove I'm a gourmet, the wine pairing for Perfectly Toasted Pumpkin Seeds is Lucky Duck Riesling ($3 a bottle at WalMart).
_______________________________________

CRAZY WEATHER, INDEED

Sandy didn't mess with us much here in the New River Valley, but it's just not right to wake up to snow on the day before Halloween!

Snow on the ground, leaves still on the trees... What the...?


Sunday, October 28, 2012

Pumpkin Carving & Banana Gingerbread

We've always used a drywall saw and a kitchen knife to carve of jack-o-lanterns. They usually turn out cute.

Last year, since a friend recommended it, but mostly because I'm a sucker for any holiday stuff that's marked 75% off, we bought a stencil book and pumpkin carving set for a little less than a buck. The little plastic  utensils looked like they might fall apart or break during the first use, but we figured the stencils alone would be worth what we paid.

I was smart enough to pack it away with the Halloween costumes and decorations, so we actually remembered we had it! Well, the stencils were all a bit big for our pumpkin. So we made our own with white paper and a Sharpie. We notched each corner so it would fit better, and taped it on the pumpkin.


We tried a new technique this year which made the pumpkin easier to handle: carve the facial features first, then cut out the top opening!


I think he's our best ever jack-o-lantern! And our easiest. Those cheap little precision tools actually worked great, didn't break, and did a better job than the stuff we used to grab out of our toolbox! We got much smoother cuts with the little saws, and the tiny plastic "drill" made it easier to get started. The best tool of all was the flat plastic scoop/scraper we used to get the strings, pulp and seeds out of the pumpkin.

And, as a bonus, our orange friend held an abundance of seeds, which are spread out to dry for roasting tomorrow night!

"Don't forget about me... I'm orange, too..."

Milburn didn't like having orange competition, so he tried to get us to let him in through the kitchen window. Notice that his left ear is all torn up- he fights with an orange cat down the street that has only half a tail.


Freezing Bananas to Use in Baking

Madeline made Banana Gingerbread from a recipe I clipped from Better Homes & Gardens years ago. As always, my changes are in italics to make one large loaf rather than three minis.  Pictured here are both my "babies"- my KitchenAid stand mixer is in the background to the left of my daughter. The mixer's been with me a lot longer!


Bread/cake recipes work best with very ripe, brown-spotted bananas. We had some at that stage last Friday when we decided to go out of town for the weekend. So I threw them in the freezer, peel and all. Here's what they looked like when they came out.


You just peel them, let them thaw a bit, and bake with them. You can also peel them first and freeze them in Ziploc bags, but that just seems like an extra step to me. They come in their own packaging, after all.

Banana Gingerbread

Yield/Servings: 3 loaves (I prefer to make 1 large loaf)
Ingredients:
2 1/4 cups all-purpose flour
1/2 cup sugar
1 1/2 to 2 tsp. ground ginger
1 tsp. baking powder
1 tsp. ground cinnamon
1/2 tsp baking soda
1/4 tsp. salt
1 cup mashed ripe bananas (2-3 medium)
1/2 cup butter (sometimes I use 1/4 cup butter and 1/4 cup applesauce- just as good!)
1/2 cup molasses
3 eggs
1/2 cup chopped walnuts or almonds
Directions:
Combine 1 cup of the flour, the sugar, ginger, baking powder, baking soda and salt in a large mixing bowl. Add mashed bananas, butter and molasses. Beat with an electric mixer on low speed until blended, then on high speed for 2 minutes. Add remaining flour and eggs; beat until blended. Stir in nuts.
Divide batter among 3 greased 5 1/2 x 3 x 2-inch loaf pans (or 1 regular-sized loaf pan). Bake at 350 for 40 minutes (about an hour for 1 large loaf) or until a toothpick inserted near the center comes out clean. Cool in pans for 10 minutes on a wire rack. Remove from pans; cool thoroughly on wire rack.

Wrap in plastic wrap when almost cool. Actually tastes better the next day, like most fruit/veggie breads.

Here's hoping Frankenstorm doesn't bring us a blizzard for Halloween! 

Thursday, October 18, 2012

Pumpkin-Ricotta Stuffed Shells

I discovered this recipe last fall, and was thrilled to share it with my sewing friend, Allison. She looked it over and started asking questions-

Allison: Where did you get fresh basil and sage?
ME: I didn't. I used a few dried herbs from my cabinet.
Allison: Did you get the pecorino Romano from Kroger?
ME: No, I used the Parmesan cheese in the shaker canister.
Allison: I thought Steve didn't like garlic.
ME: He doesn't, so I left it out. But I snuck in a little garlic powder.

You get the idea. So, I am pleased to pass this family favorite along to you, with my adaptations in italics.


Pumpkin-Ricotta Stuffed Shells
Country Living/ October 2011

24 jumbo pasta shells (cook the whole box, they don't all survive intact!) 
1 tablespoon extra-virgin olive oil (I didn't use this, although it probably keeps them moister)
22 ounces (2 1/2 cups)  fat-free ricotta (my container was a few ounces more, but I used the whole thing)
1 (15 ounce) can pumpkin puree (I have used both puree and solid pack pumpkin, which is easier to find at the store. Both work.) 
2 1/2 ounces (3/4 cup plus 2 tablespoons)pecorino Romano, grated (I used grated parmesan from the shaker canister)
1 large egg white
2 garlic cloves, minced (I substituted a little garlic powder)
1 cup fresh basil and 1 tablespoon finely chopped fresh sage (I used 1 teaspoon each of dried thyme, basil, parsley and marjoram instead)
1 teaspoon salt
1 teaspoon freshly ground pepper
1 (26 ounce) jar store-bought tomato sauce (I used a 24 ounce can of Hunt's Four Cheese spaghetti sauce)

1. Cook pasta shells according to package instructions; drain. Transfer to a baking sheet and drizzle with oil. Set aside and let cool.
2. Meanwhile, in a medium bowl, stir together ricotta, pumpkin, 3/4 cup of pecorino Romano, and remaining ingredients, except tomato sauce.
3. Preheat oven to 350. Spread sauce in bottom of 9x13" baking dish. Fill each pasta shell with about 3 tablespoons ricotta-pumpkin mixture and arrange in pan. Cover pan with foil and bake for 30 minutes.  Remove foil, sprinkle with remaining pecorino, and bake for 15 minutes more. (If desired, stuff shells the night before and refrigerate overnight in an airtight container, in between layers of plastic wrap; arrange shells on sauce right before baking.) This might be where the drizzle of olive oil would come in handy.

I refrigerate what's left over and microwave future servings as needed. It's just as delicious the second (and third) time around.

If you are intimidated by the idea of stuffing the shells, don't be! I was, too, but if I can do it I know you can. Figure out how 3 tablespoons of filling relates to a 1/4 cup measuring cup, and use that- it's easier than spooning out 3 separate tablespoons each time. Hold the shell in your palm, propping it open with your thumb and forefinger. Fill it with the measuring cup in the other hand. Since my larger container of ricotta makes a bit of extra filling, I am usually able to generously stuff about 28 shells, which is about how many usually don't fall apart before I can get them stuffed. 

For another great pumpkin treat, try my favorite Cranberry-Pumpkin Bread recipe. 

Be on the lookout for my upcoming experiments with Parmesan Pumpkin pasta sauce!


Thursday, August 9, 2012

Our Second Favorite Way to Eat Apples in Summer: Apple Salad

Our trip to the grocery store today turned up these 
gorgeous Gala apples (our favorite variety):


This shiny beauty weighs an incredible 13.5 ounces!


Obviously, the very best way to eat these crisp, crunchy apples (which are somehow sweet and tart at the same time) is thinly sliced with the peel still on!

Our second favorite way, and possibly our favorite summer recipe, is the apple salad I created for my husband, who can never get enough apples and eats them every day! Like a lot of my recipes, it's more abstract than specific. I'll leave you to your own proportions and ingredient choices. It's bound to turn out delicious no matter what- so here's the general idea-

Steve's Apple Salad

1. Cut 1 apple per person (depending on hunger level and size of apples) into bite-sized pieces (maybe 1/2" square).
2. Here's the secret ingredient: Toss the apples in a splash of flavored vinegar. This adds flavor to the salad, and keeps the cut apples from browning too quickly.
3. Add Miracle Whip Light until it's as mayonnaise-ey as you like it.
4. Mix in one, some or all of the following: raisins, dried cranberries, sunflower seeds, chopped walnuts, chopped pecans, toasted sliced almonds, or anything else that sounds good to you.

It's so delicious, it could be dessert! 


A Word About Flavored Vinegars


I always keep a selection of flavored vinegars in my pantry for use in salads and marinades. My favorites for Steve's Apple Salad are shown here: Citrus Champagne Vinegar from Sur la Table and Cranberry Pear White Balsamic Vinegar from Oliveto in Roanoke. Only a light-colored vinegar should be chosen for this salad, as a darker dressing will interfere with the beautiful coloring of your fruit.

Thursday, July 19, 2012

Feelin' Peachy!

Is there anything prettier than a fresh peach? Maybe two...


Over 150 Peach Recipes

The Working Homekeeper got me craving fresh peaches by posting three recipes using North Carolina peaches:  Peach Ice Cream (without an ice cream maker), Peach Pie from scratch, and Peach Jam. They all sounded delicious, but my favorite way to eat a peach is simply washed and sliced. I rarely feel the urge to embellish it further. But if you do, or you have lots of peaches to use up, like Jamie probably did, follow these links to over 150 mouth-watering peach recipes:


How to Choose Peaches

According to my 1959 edition of The Culinary Arts Institute's Encyclopedic Cookbook, peaches "should be free from blemishes, firm, fresh-appearing with white or yellowish ground color. Green ground color indicates fruit was picked too soon to allow ripening."

Growing a Peach Tree From a Peach Pit

Dickey Farms offers instructions on how to plant a peach pit and, within three years, grow your own peach tree!  I'd love to try that, but my gardening success has been limited to herbs! Even with a fence, the deer and other critters have always managed to eat everything else I've planted. If you try it, I'd love to hear how it turns out.

A Peach is a Peach- Right?


OK. I did know that there are two types of peaches- white and yellow (the color of the flesh). But The Family Circle Dessert and Fruit Cookbook (1954) from my collection explains that peaches can be further subdivided beyond color into freestones (the stone pulls easily away from the flesh) and clingstones (the flesh clings closely to the stone). I can remember watching the episode of All in the Family where Edith talks about "cling peaches" and never really knew what she meant! Now I do, thanks to my vintage cookbook collection.


 The Best Way to Drink a Peach

I couldn't possible close this peachy post without mentioning my very favorite cocktail- the Bellini! Created by Harry Cipriani at Harry's Bar in Venice, and named for an Italian impressionist painter, the proper Bellini is made with prosecco sparkling wine and fresh white peach puree. I fell in love with this pink, effervescent drink at Harry Cipriani on Fifth Avenue in New York last summer. Since then, I've learned that most restaurants do not make them the same way. Probably because most bartenders do not happen to have fresh   white peaches lying around behind the bar just waiting for someone to order a Bellini. Some substitute peach concentrate or syrup, which is not as frothy as fresh white peach puree, but acceptable. And some substitute champagne for the prosecco, which isn't incredibly different unless you're a sparkling wine expert. But don't waste your time on a Bellini made with peach liqueur. It's not even close!

If you want to try making Bellinis at home, here's Mario Batali's Bellini recipe, which sounds authentic. 

What's your favorite way with peaches?


P.S. I'm still having a little trouble with random, involuntary highlighting of text! Please excuse it when you see it...

Friday, June 29, 2012

Devilishly Delicious!


I've been dreaming of deviled eggs ever since I read this post on Kath Eats Real Food.  So I finally made some! I didn't take pictures of my eggs  (because hers look so much better), nor did I take pictures of the process (because she did a great job with that, too). But I will add my two cents worth to the subject: my favorite deviled egg recipe.


Zesty Deviled Eggs


6 hard-cooked eggs
3 tablespoons Miracle Whip Light
2 teaspoons lemon juice
1 teaspoon Worcestershire sauce
1/4 teaspoon dry mustard
dash salt & pepper


1. BOIL EGGS:  Put eggs in saucepan and cover with cold water. Bring water to a boil- then reduce to simmer and start timing about 15 minutes (according to Joy of Cooking). Plunge in cold water immediately after cooking to stop the cooking process and prevent discoloration of yolks.

2. Slice eggs in half lengthwise. Remove yolks.

3. Mash yolks and mix well with other ingredients.

4. Stuff egg whites. Like Kath, I just stuff them with a spoon. I never feel like getting out (and cleaning up) all the pastry decorating paraphernalia just for deviled eggs. Maybe if I were serving them to guests...


My Summer Deviled Eggs


In summer, I like fresh-tasting dishes, and I have a nice little patch of lemon thyme growing in my herb garden. So, for my summer deviled eggs, I mix the yolks with Miracle Whip Light, lemon juice, a handful of lemon thyme, salt and pepper.

I imagine many fresh herbs would be just as good. Experiment a little! Sometimes I make "summer eggs" in winter by substituting dried dill. 


If you don't have an herb garden (or room for one), try container gardening!  All you need is a sunny spot like a windowsill, patio or balcony. 


How do you use your fresh herbs?

Saturday, June 2, 2012

How We Know It's Summer! (And Potato Packet Ideas)

The Old Farmer's Almanac might say that summer officially arrives at 7:09 PM Eastern Daylight Time on June 20, but as far as I'm concerned, it's here! These are the signs that summer began this week:

  • School's out

(Sorry, I couldn't resist... )


  • Mabzie picked the first of many roadside daisies for our Fostoria American vase (a summer tradition since she was old enough to pick them):
  • We fired up our grill today for the first burgers of the season.

The foil pouches on the left are our favorite grilled potato packets. They're my summer version of Potatoes Anna. It started out with a recipe from Southern Living, which I can't seem to find anymore, and has evolved now into more of a technique:

  1. Spray a sheet of aluminum foil with non-stick cooking spray for each serving. 
  2. Place a couple of thin pats of butter on each sheet.
  3. Layer very thinly sliced potatoes (either peeled or not, your choice) in a circular pattern. Place a little more butter on top. Salt and pepper to taste. Add other seasoning or onions if you like. The one above is plain 'cause that's how my husband and daughter like it.
  4. Fold foil into packets as you see on the grill above and cook 30 minutes to 1 hour, depending on how hot your grill gets! Make sure to check that they aren't getting burned on the bottom, and flip over at least once during cooking.
  5. Open packets and chow down!
If you're more comfortable with an actual recipe, I'd urge you to try one of these links. They all sound great!

  • Our little birdie's back! She (or I guess it could be he...) has slept above the column on our front porch for several summers now. I'm not sure of the species because she keeps her head buried in the corner, like you see here. So it's hard to take her picture, but I'm always happy to see her! 

In other bird news, the bird bottle above our back entrance (the one I said no bird family had ever nested in) is now home to another bluebird. I hope that means more babies, since I didn't get to see the others leave the nest!

What signifies summer around your house? I'd love to hear what's happening this week. 

New Favorite Pancake Recipe

Our family's favorite pancake recipe was Bisquick Melt-In-Your-Mouth Pancakes from the back of the box. Years ago, we graduated from straight pancake-mix-pancakes to these upgraded puffy ones. The baking powder and lemon juice makes them much fluffier than a regular mix. And definitely yummy. They had earned a spot in my personal, handwritten, pass down through the generations if anyone cares, guard with your life, save in case of fire, cookbook.


But then, along came Fluffy Pancakes from allrecipes.com. Even better! Mabzie and her thirteen and fourteen year old sleepover friends whipped up a batch on their own. Mabz had been saving the recipe on her ipod, and although our cupboards were nearly bare, we had all the ingredients. This image doesn't do them justice, but you can see how much they rose on the griddle. When you mix the milk and vinegar in the first step, you can actually see the bubbly chemical reaction taking place. The recipe says it makes four pancakes, but they made nine about this size.


Any pancake recipe that uses an acid, like vinegar or lemon juice, along with baking powder, should be extra light and fluffy like these.

Another tip I shared with the girls was how to tell when your griddle is hot enough. Dip your fingertips in water and flick it out onto the warm griddle by quickly opening your hand. If it sizzles, it's ready to make perfect pancakes. If not, it's not hot enough, and your batter will spread out too far, making them too thin.

Finally, I would like to leave you with a link to a page of pancake poems! Enjoy!

Wednesday, April 18, 2012

Best Macaroni and Cheese Recipe Ever

A chef I once knew (who is no longer with us) made the most delicious macaroni and cheese. When I asked for the recipe years ago, he was happy to oblige. The only problem was, he had been making it in a hotel pan for a restaurant buffet! He stood there on the spot and figured out (while I took notes) how I would make just enough for a family. After tweaking it just a tad, it turned out just like his! Now that Fred is gone, I like to think that I make the best mac and cheese around.  No sense keeping all that creamy, cheesy deliciousness to myself, so here it is... Enjoy!


Fred's Macaroni & Cheese

4 cups macaroni
2 1/2 cups milk (I use fat-free... might as well try to counteract all that cheese)
2 eggs
5 cups grated cheddar cheese (I like Kraft Triple Cheddar mixed with any sharp cheddar)
1 teaspoon dry mustard
salt and pepper to taste

1. Preheat oven to 350 degrees.
2. Cook macaroni according to package directions and drain.
3. Put drained noodles back into pot and mix with three cups of the cheese.  Season with salt and pepper to taste.
4. In separate bowl beat eggs with fork. Mix in milk and dry mustard. Add to macaroni in pan and mix well.
5. Spray 13x9 (3 quart) baking dish with cooking spray and pour in macaroni mixture.
6. Top with 2 more cups of cheese.
7. Bake 25-30 minutes until bubbly.

This recipe feeds my family of three as a main dish at least twice. You can easily cut the recipe in half and bake it in a 2 quart dish, but I  never do this. You may want to stick with nearly the same amount of cheese on top, since the surface area of the casserole is not that much smaller. 


Monday, March 26, 2012

Chewy Cocoa Brownies from Nestle'

I'm starting you off with the only brownie recipe you'll ever need- straight from the back of the Nestle' Unsweetened Cocoa container. Honestly, that's one of the best places to get a recipe!


Makes 24 delicious brownies, great for dessert, snack or bake sale!


1 2/3 cups granulated sugar
3/4 cup (1 1/2 sticks) butter, melted
2 tablespoons water
2 large eggs
2 teaspoons vanilla extract
1 1/3 cups flour
3/4 cup unsweetened cocoa powder  *not instant cocoa mix*
1/2 teaspoon baking powder
1/4 teaspoon salt
3/4 cup chopped nuts (optional)  *I never put these in*


1. Preheat oven to 350 degrees.
2. Grease 13" x 9" baking pan.
3. Combine sugar, butter and water in large bowl.
4. Stir in eggs and vanilla extract.
5. Combine flour, cocoa, baking powder and salt in medium bowl; stir into sugar mixture.
6. Stir in nuts if desired.
7. Spread into prepared pan.
8. Bake for 18-25 minutes (mine usually take about 20 minutes) or until a toothpick inserted in the center comes out slightly sticky.
9. Cool in pan on wire rack. 

These are almost as easy as a boxed brownie mix! No mixer required- a wooden spoon works just fine.