Labels

Attic (4) Baking (14) Bird Bottles (3) Books (1) Buttons (2) Challenges (5) Chuckles (3) Cleaning (1) Confessions (6) Cooking (23) Critters (12) Decorating (1) Fabric (3) Fall (5) Freebies (3) Holidays (23) Kitchen (2) Meal Planning (6) Organizing (6) Parenting (2) Pumpkin (5) Quilt Camp (2) Quilt Guild (3) Quilting (11) Rainbows (2) Recipes (14) Saving Money (17) Scrap Bins (3) Sewing (8) Sewing Room (12) Spring (10) Summer (7) Tuesday Tips (14) Tutorials (3) Vacation (8) Winter (1)
Showing posts with label Tutorials. Show all posts

Monday, September 17, 2012

Sewing Room Monday: Productivity

I'm proud to announce that I not only accomplished what I'd planned to last night sewing-wise, but I exceeded everyone's expectations- even my own (which admittedly weren't all that high...)

I mended the sock, fixed the sweater picks and hemmed the pants.

Then I:

  • ironed a pair of Mabzie's capris  that might've been lying around for about two weeks
  • repaired a seam on one of our traveling suitbags (ripped in July)
  • sewed a button on an American Girl sweater (Lord knows how long it waited in the pile)
  • appliqued a fabric heart on an AG t-shirt to cover where another fell off (waited with the sweater)
  • sewed a flannel backing onto part of an old ironing board cover to make an extra pressing surface
  • worked on the travel iron caddy/pressing pad I started at camp in July
  • finished a sewing apron I started a couple of weeks ago (pictured below, the writing is backwards because since it was a mirror shot- I didn't sew it wrong)
So, I guess I showed them... (and surprised myself)!


Fast & Easy Fat Quarter Apron
The tutorial for this apron is in this previous post.  The decorative stitching which divides the pocket really made a difference on this one, don't you think? 


Thursday, September 6, 2012

Fast & Easy Fat Quarter Apron Tutorial

Pat from Old Trinity Schoolhouse Quilt Shop designed the cutest, quickest sewing apron you've ever seen! She's a delightful, energetic red-head whose catch-phrase is "If you are what you quilt, I'm fast & easy". So I'm calling this "Pat's Fast & Easy Fat Quarter Apron".


Here's all you need to make it:


2 coordinating fat quarters
(one print can be directional, but both would make it complicated)
3 yards 1-1/2" wide grosgrain ribbon
thread

REALLY!


Pat, who was wearing her apron, was the only one of us at Quilt Camp (read more about camp here) who could keep track of her cell phone and seam ripper. She was sweet enough to grant me permission to demonstrate it at The Quilting Party meeting Tuesday night. In fact, she told me to teach it to anyone I wanted, so I'm sharing it here with you in case you missed it!

Sandra, Christina, Pam, Me, Laura in our fast & easy aprons!


Here's how you do it:


1. Place 2 coordinating FQ's right-sides-together and press.

2. Square up edges with rotary cutter, making sure to remove the selvedges. The finish dimensions are not important. Mine ended up about 17"x21".

3. Pin together and sew using a 1/4" or 1/2" seam allowance. Leave a space a bit larger than your hand unsewn on one short side for turning (as if you were making a beanbag or pillow cover).

4. Clip corners, turn right-side-out, and press flat.

5. Fold one long edge up about 6" to make one large pocket. Pin and press. Audition both fabrics as the outside pocket along with your ribbon to see how your apron will look best.


6. Edgestitch along each short side to hold pocket in place. It works best to sew both sides  from bottom to top. Some of the brighter quilters in the group used their walking feet, which they say helped. I'm not that smart, so I just used my regular foot.

7. Mark your individual pockets depending on what you wish to put in them. For my first one I just measured 3" from each side and 6" from each side, which gave me four small pockets and one larger middle one. If the pockets are too deep for your phone or other items, you can sew across the bottom of some of the pockets to make them shallower. Any stitch will do for separating the pockets, but I used one of the many neglected decorative stitches on my Bernina.


8. Cut 2-3 yards of grosgrain ribbon, depending on your waist size and the size of bow you want. Tie a bow at your side waist (so it won't get it your way or hurt your back as you sit and sew for hours). Pin or clip the apron on and mark where it lines up.  The ribbon will be shorter on the bow side of the apron.


9. Line up the top edge of the ribbon with the top edge of the apron. Edgestitcth at top and bottom of ribbon, and where the ribbon meets the apron on each side.

10. Model your adorable apron, made in just a few minutes from two fat quarters and a roll of grosgrain ribbon! Yes, those are my jammies...


12. Make more- they're addictive! This apron could be easily adapted as a child's coloring apron (think tiny crayon slots), yard-sale apron (for change, pen, tags), nail/hardware apron (made of canvas), you name it. The possibilities are endless!

Thanks to members of The Quilting Party for their participation, and to Pat for her great idea!


TIP: Instead of pins for this project, I used these Wonder Clips by Clover, actually designed for use as binding clips. They're easier to use than pins in some cases, and you can run them all the way up to your presser foot because the bottom side is flat. Some quilt guild members asked about them last night, so I am including the information here. I got mine at Sew Biz Quilt Camp (about $4 for 10).

Sunday, May 20, 2012

Sewing Room Sunday: Storage Basket Makeover

View of sewing cottage from back door
Since I usually spend a lot of my weekend in my sewing room (cottage, really, out in the backyard), it makes sense for my Sunday night posts to be about what's going on up there. I say "up there" because it's up the hill a bit.
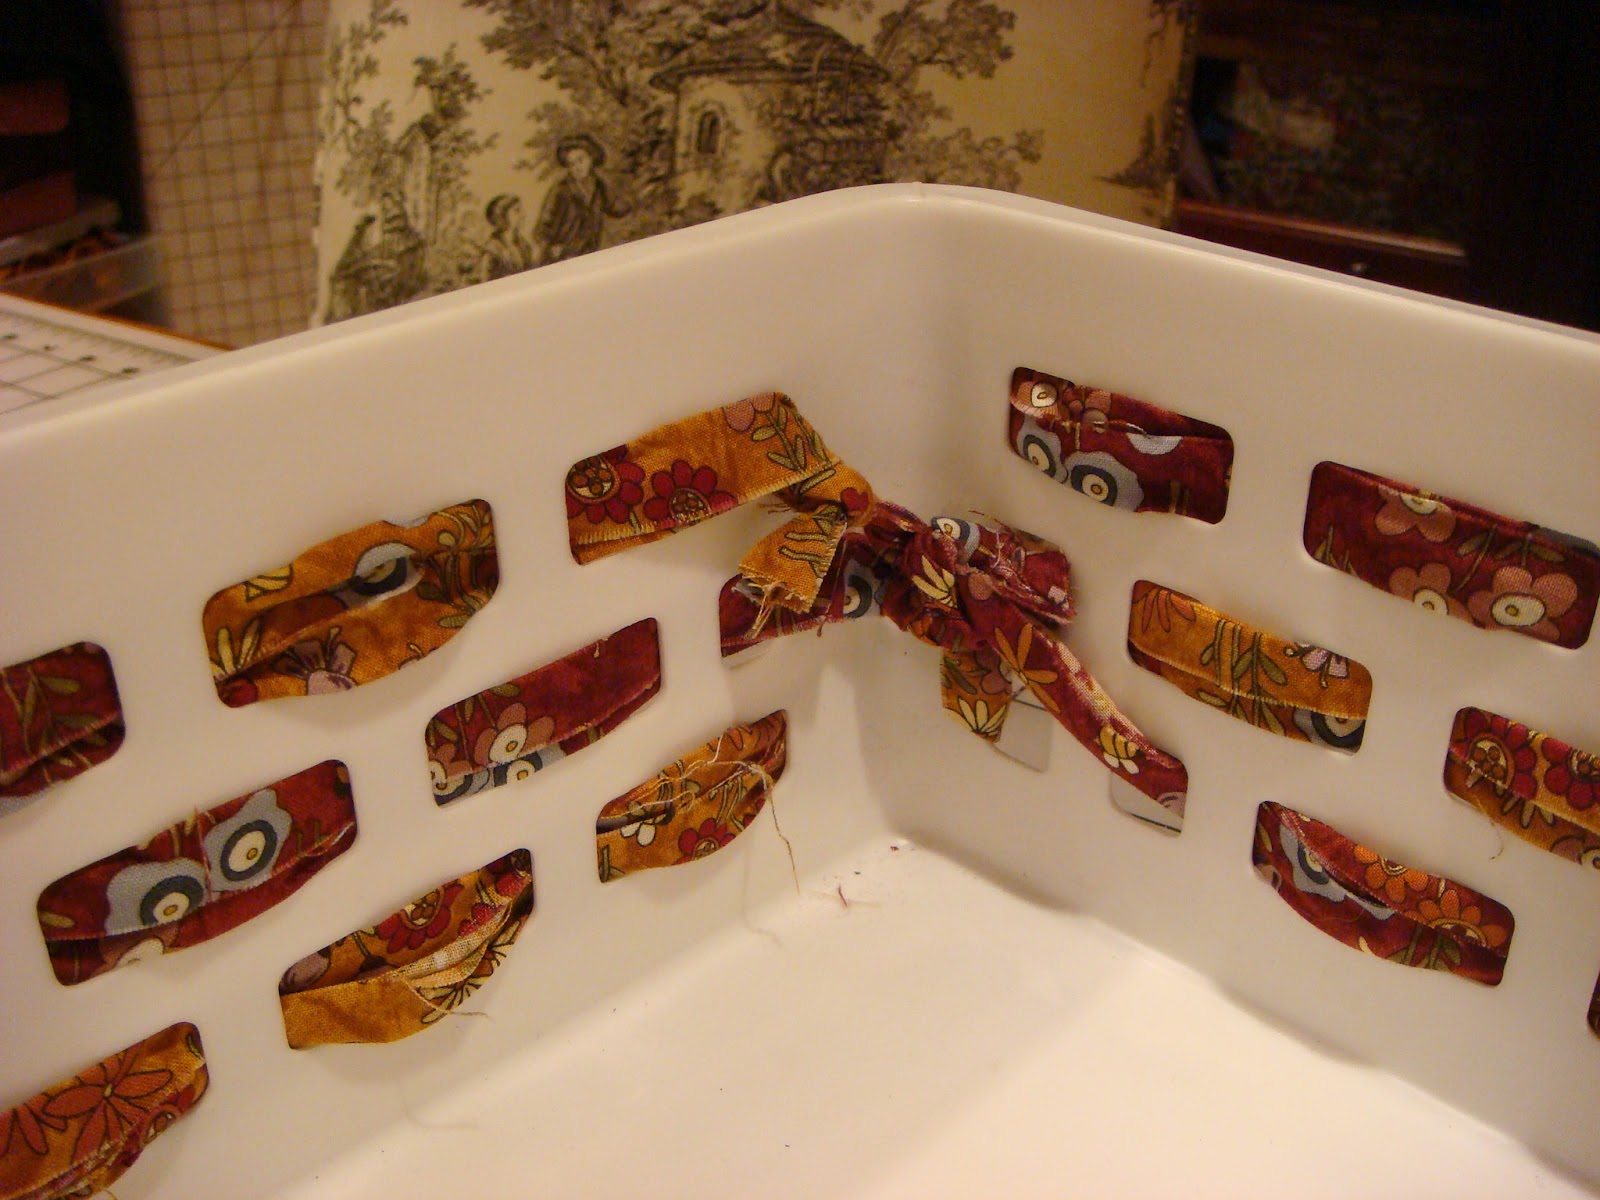
My friend and sewing student, Allison, thought you'd like to see how I dressed up my plain white plastic storage baskets to blend in with my sewing room decor. We had these containers left over when we bought new wicker ones for our bathroom linen closet. They fit nicely on my bookshelves, so I used them plain for awhile, to hold my smaller scraps. But the white really stuck out and bored me. So one night I cut some 2.5" strips from a fabric I had in two different colorways. Then I calculated the strip length required to thread one continuous strip through all three rows of holes. I sewed enough strips together, end to end, for each basket, alternating colors. I angled the seams (out of habit) like you would for quilt binding (instructions here from Heather Bailey's website), but I think a straight seam would've worked just fine.
Inside view of scrap basket
After threading the strip through (top to bottom), making sure the outside corners looked neat, I tied the beginning and end together inside the basket. Not an extremely neat finish, but good enough for the inside of a scrap basket. If you come up with a better idea, please comment! 
There's no before picture, but I think they look pretty good now! I did a larger-size basket (also retired from service in my bathroom) for my daughter's under-sink cabinet some of the colorful organdy ribbons I'd saved from gifts and packaging. These projects used only items we had on hand. I love finding new uses for items we already own!